How Do Photographers Edit Photos? A Step-by-Step Breakdown
When I was first starting out with photography, I would always ask “How do photographers edit photos?”. For many amateur or hobbyist photographers, editing software and even photo editing, in general, can be intimidating. I’m here to show you that it really isn’t, I have listed below my typical editing process as a professional photographer.
This is my exact editing process, it’s exactly how I edit photos for client work. The specific photos featured here are from a grad shoot I did recently for a friend of mine. Although this specific shoot wasn’t paid work, my editing process remained the same.
Two things to note about the process of editing photos are that the order of these steps is not set in stone; I often start on different steps or jump back and forth between steps, making adjustments as needed.
The second thing to note is, that to speed up time, I use custom presets for the editing software I use. In this article, I’ll outline the basic changes that these presets make as well as where in the process I apply the preset.
For the exact presets I created and use in my client work, check out the Creatives for Christ shop.
An important point about presets is that they aren’t meant to be “set and forget”, they are meant to be applied and then adjusted based on each unique photo; presets are a starting point, not the endpoint.
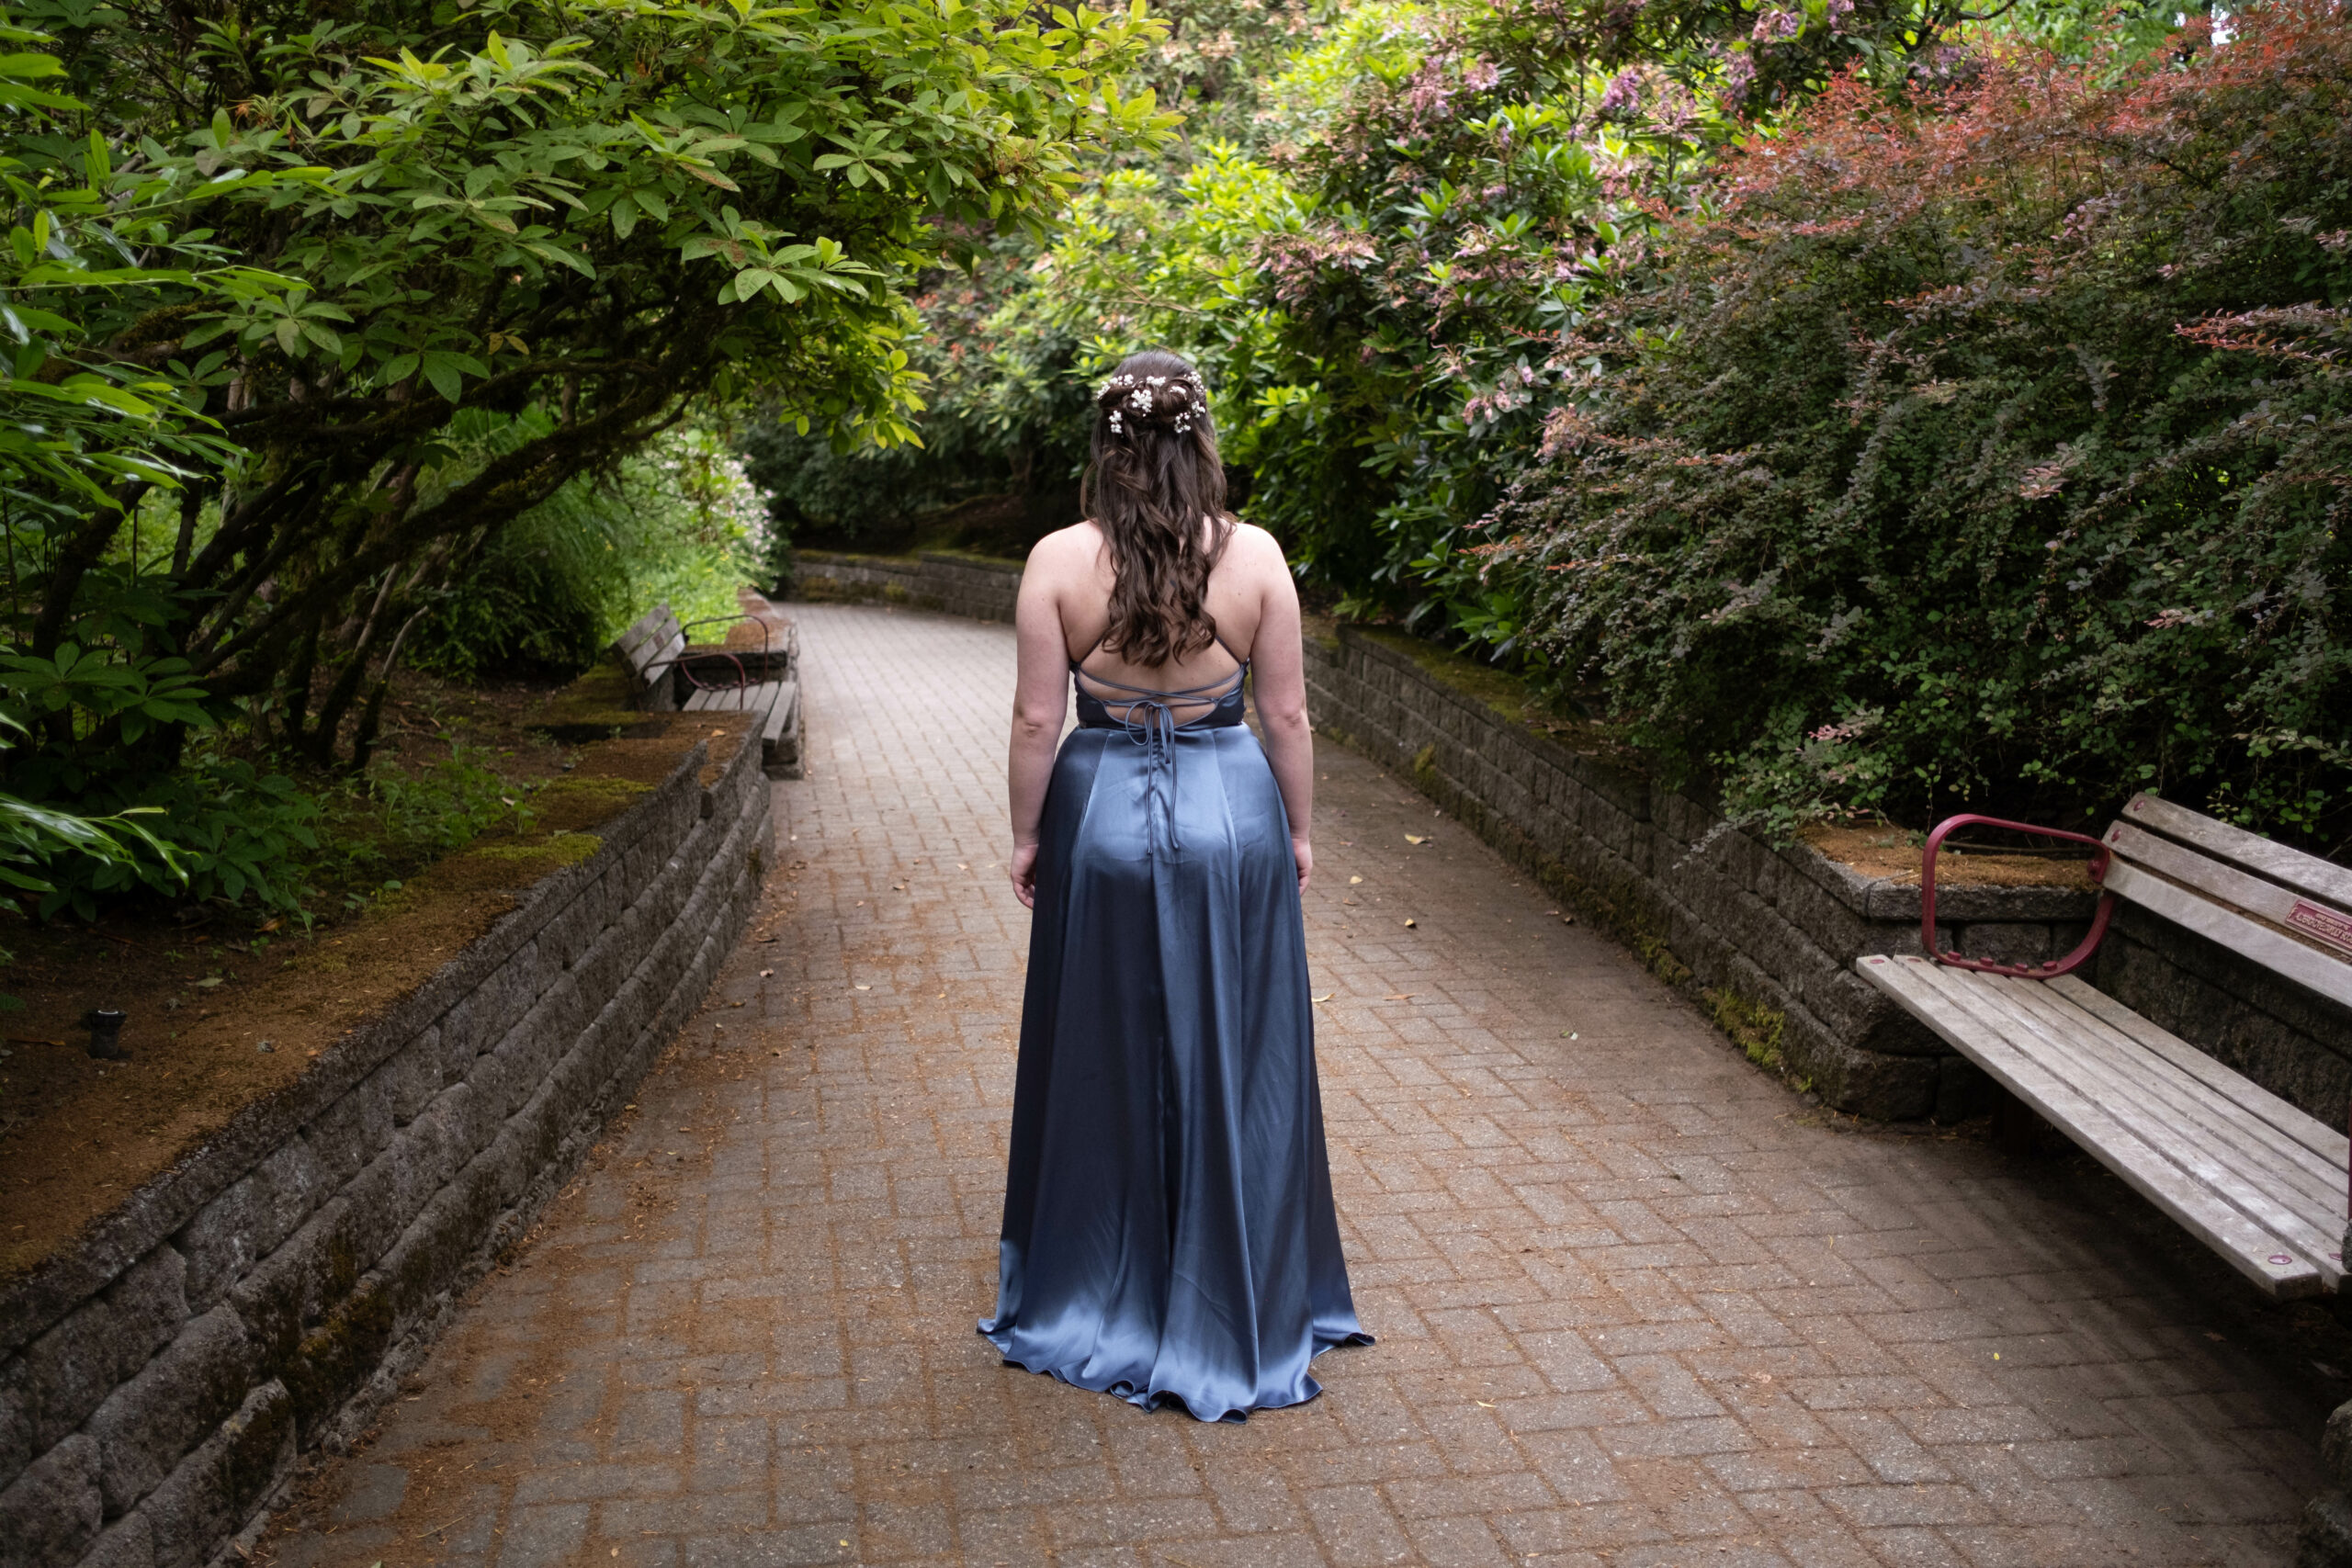
Below are the before and after for one of the images from this shoot.
/modal

1. Back-Up Photos
The first step every photographer should do when editing photos is to back them up! You never know what is going to happen to your storage device, files, or even computer. It’s better to be safe than sorry, which is why I follow the 3-2-1 rule.
The 3-2-1 rule states that you should have 3 copies on 2 drives with 1 being off-site. Aside from my editing drive, where files get wiped after final deliverables are sent, I store my files on an external hard drive for long-term storage and Dropbox.
The advantage to Dropbox is that it is off-site and it’s easy to get more storage if needed. The downside is that there is a subscription fee that I pay annually.
As for my long-term storage, I use a hard drive where I keep two backups in separate folders. It’s true that hard drives have slower read and write speeds than solid-state drives (SSD) but, for long-term storage, hard drives are safer. This is because of the way SSDs store information. SSDs use electrical charges to store information. This means leaving your SSD untouched for long periods can result in information loss.
In my client contracts, I have a stipulation that states I will only store their photos for a maximum of two years. After two years, I delete their shoot-off of my drives to save space.
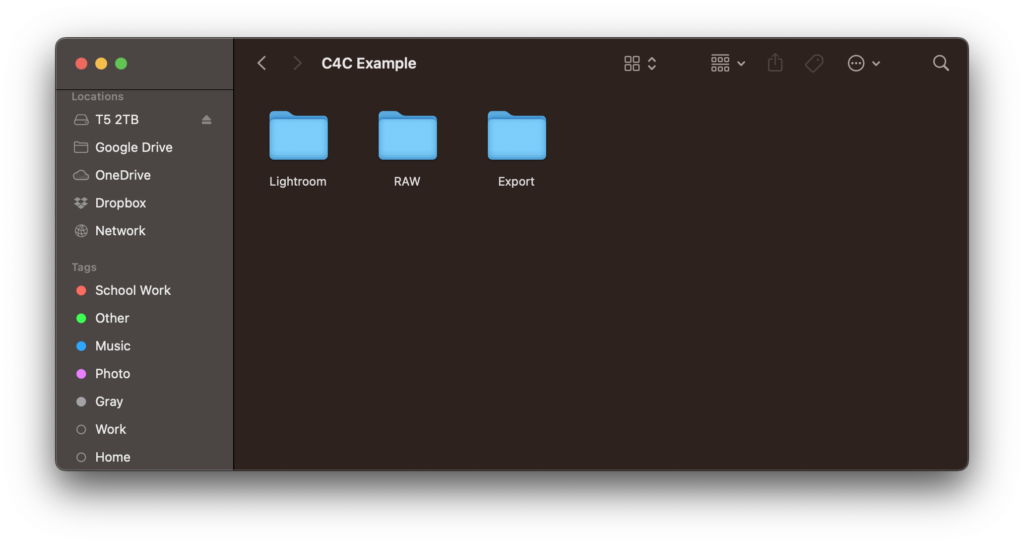
When backing up your photos it’s important to keep your files organized. I like to organize my files by shoot type (event, portrait, travel, etc.), then the date (year folder, month folder, specific shoot). Then each individual shoot gets three main folders; “Lightroom” for all Lightroom catalog files, “RAW” is where all of the RAW images go for the Lightroom Catalog to reference, and the final folder is the “Export” folder where all of the finished photos go.
2. Open Primary Editing Software
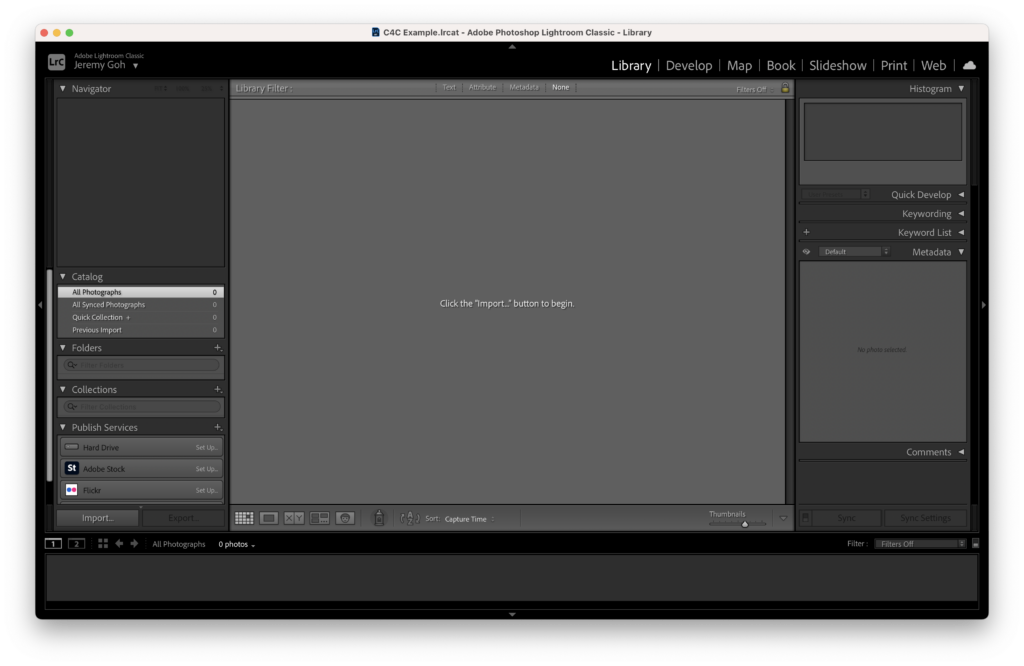
After backing up my photos, I then open my primary editing software. I say “primary” because I usually use multiple programs, all for different things to edit photos. In this case, I used three programs; Adobe Lightroom Classic, Adobe Photoshop, and Exposure X7. Each has its purpose; I start with Lightroom Classic where I do the bulk of my editing.
3. Create A New Catalog
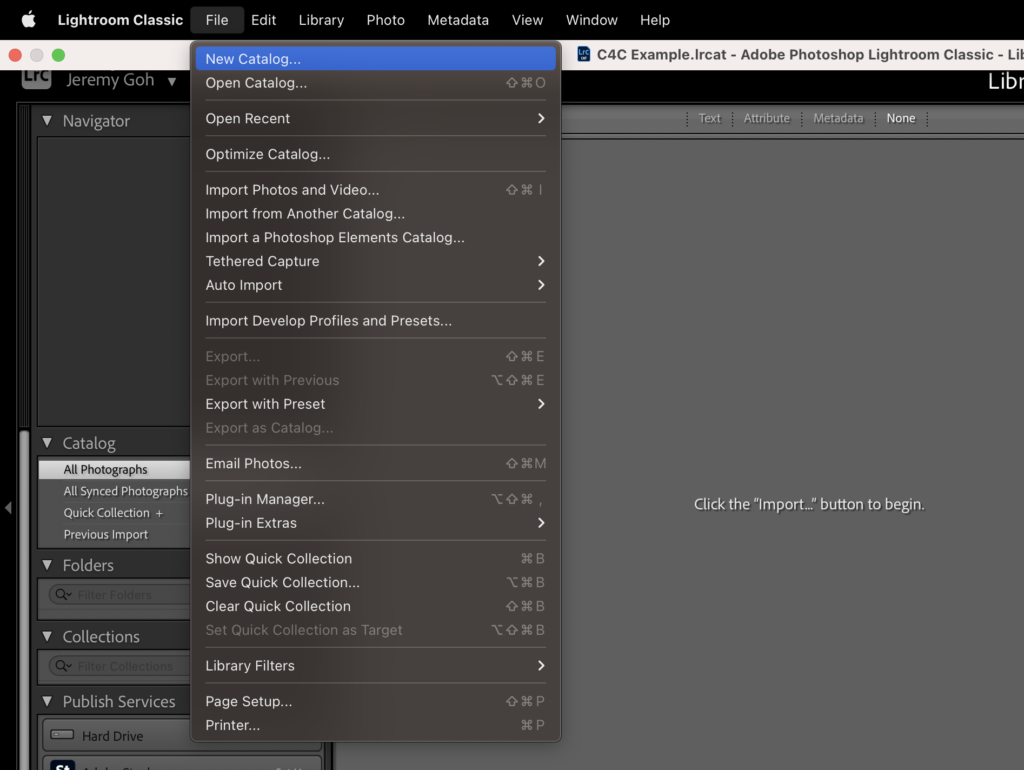
Now that I have opened my primary editing software, Adobe Lightroom, I create a new catalog. Some photographers use a single catalog for multiple shoots, I like to keep them separate. Each shoot has its own catalog in its own folder on my drive.
File > New Catalog
New Lightroom Catalog
A catalog is a database that stores a record for each of your photos. This record contains three key pieces of information about each photo: 1. A reference to where the photo is on your system 2. Instructions for how you want to process the photo 3. Metadata, such as ratings and keywords that you apply to photos to help you find or organize them
Source
4. Import Photos Into The Editing Software
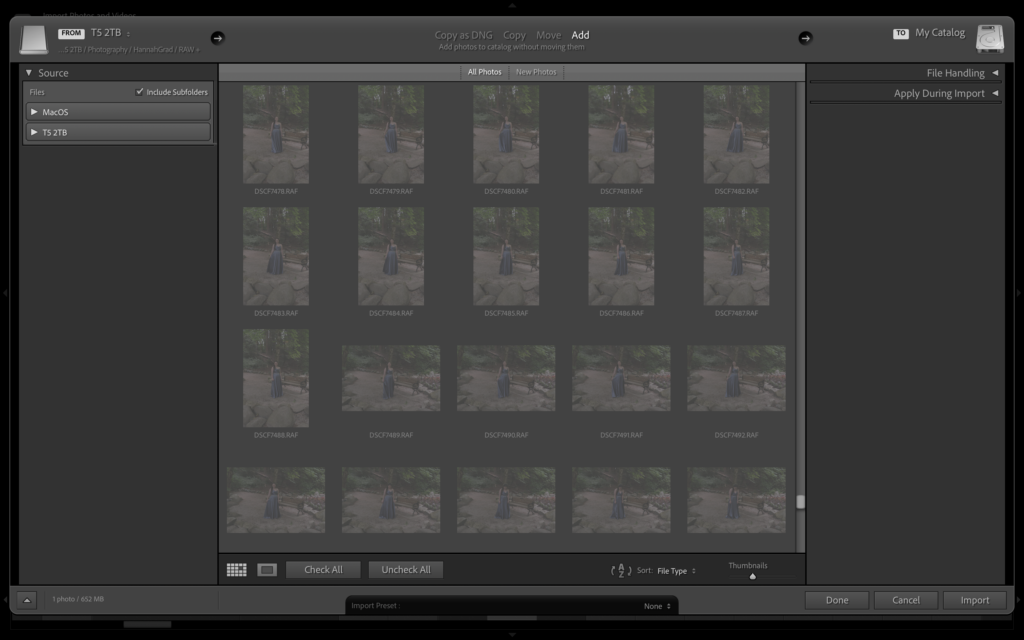
Once I’ve created a new catalog, I press the “Import” button in the bottom left of the “Library” tab to select the photos that I’d like to import. Then I select the photos from the “RAW” folder on my edit drive (SSD), not either of the backups on my hard drive, and certainly not the files on Dropbox.
At this point we hit a crossroads; you can either cull now or later. Culling is simply just flagging photos as “yes” or “no” for editing and delivery. I usually import all of the photos from the shoot together, you never know what diamonds in the rough you might find later. Depending on how many photos you have, this could take some time. I usually take a stretch or grab a snack while the photos import.
5. Select Which Photos You Will Edit & Deliver
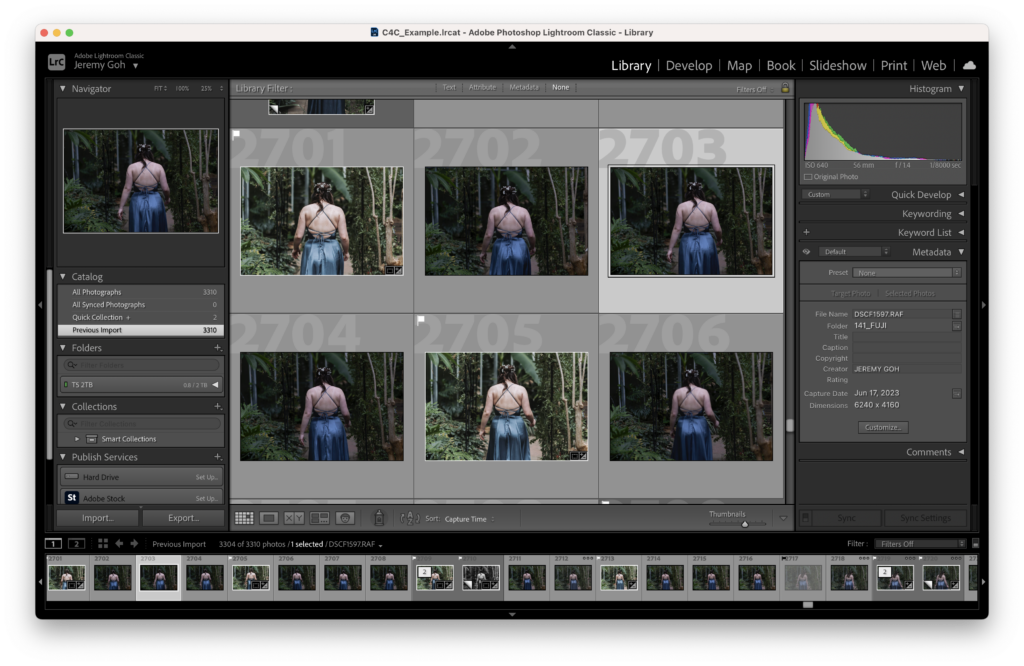
After importing all of the photos, I cull them. In Lightroom, I use the built-in flagging system. I press “P” for “Pick” to flag an image I would like to edit and “X” for “Exclude” to flag an image I would like to skip editing. An alternative rating method is to use the numbers 1-5 to mark how many stars a photo is; you can then sort the images by stars.
If you look at the photo roll at the bottom of the screenshot above, you can see that some photos have flags in the top right corner. These are photos that I have decided to edit. Above the photo roll to the right of the screen is the “Filter” section. Here, you can choose to filter your photos in lots of different ways, I usually filter by flagged so only flagged images show.
6. Adjust The Image’s Exposure
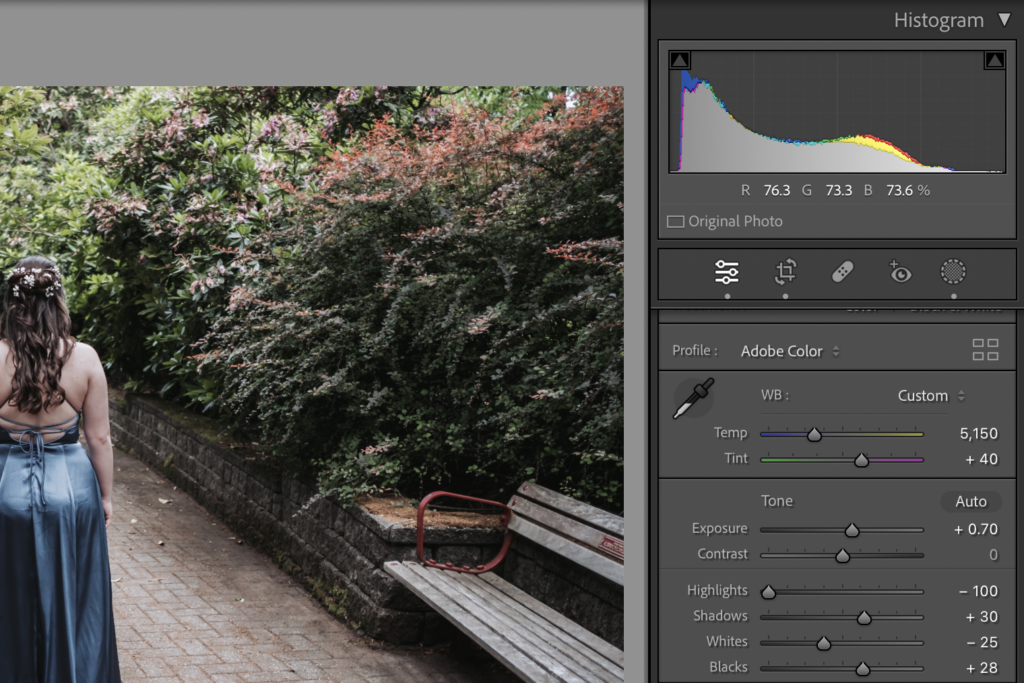
Now that I have finished culling, I can begin to edit photos. My actual editing process usually begins by adjusting exposure. There are plenty of tools available for use to adjust exposure such as; the exposure slider, highlights, shadows, whites slider, blacks slider, and the tone curve. I adjust partially by “feeling” going until it looks right to me. The other part of these adjustments is by using the histogram.
A histogram is a frequency distribution chart. What this means is that, on the graph, the taller a section is, the more pixels are at that luminance level. The further to the right a bar is, the more exposed the pixels are.
In the photo above we can see that the histogram is somewhat “right-skewed” meaning it is higher to the left of the image. This tells us that that there are a large number of shadows or dark pixels in this image.
7. Adjust The Image’s White Balance
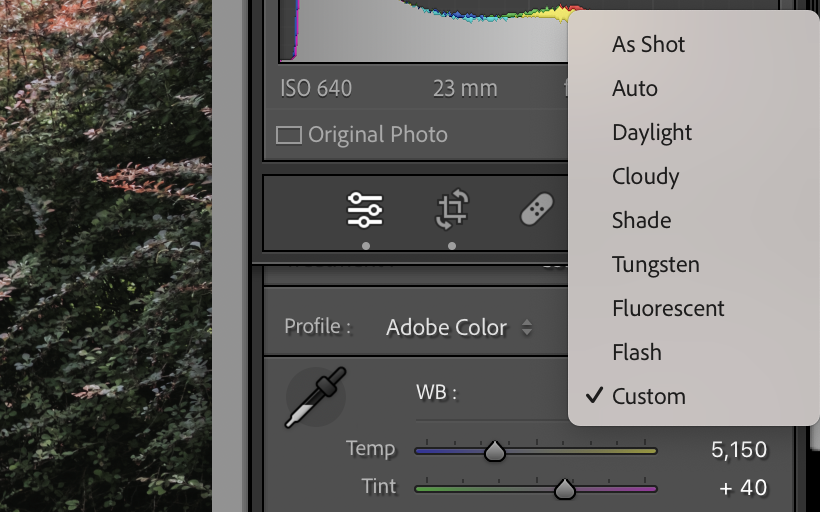
There are plenty of preset settings for white balance in Lightroom. If I haven’t pre-set it in-camera using a white balance card, I start with the “Auto” setting and go from there. I try to keep all of the photos shot in the same area around the same white balance.
8. Make Adjustments To Crop & Level
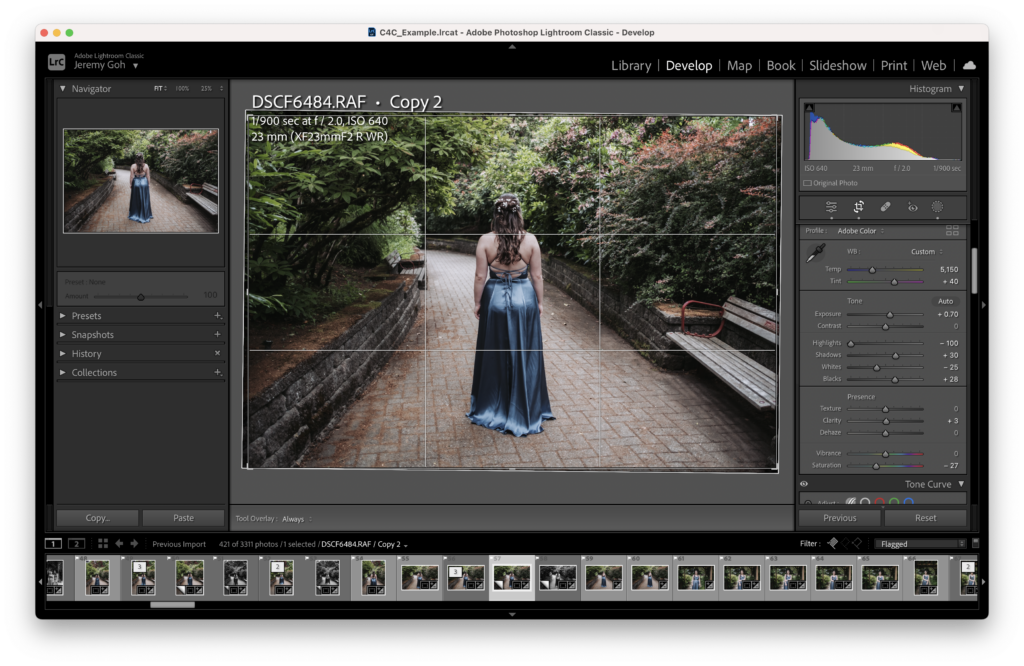
Now that I’ve got some of the general settings down, I adjust the crop and level. When I make crop adjustments, though I go somewhat by feel, I also follow composition rules.
In Lightroom there are two ways you can do this; either by pressing “R”, or the crop button in the top right under the histogram. The second way to level is to use the auto-transform function in the transform section; this will option automatically level your photo.
Rules of composition are extremely important in photography not only when you edit photos but also when you take them; if you’ve ever seen a photo, thought it looked amazing, but couldn’t explain why, it’s probably largely in part due to the composition. Check out my article where I break down the most important rules of composition.
9. Make Colour Adjustments
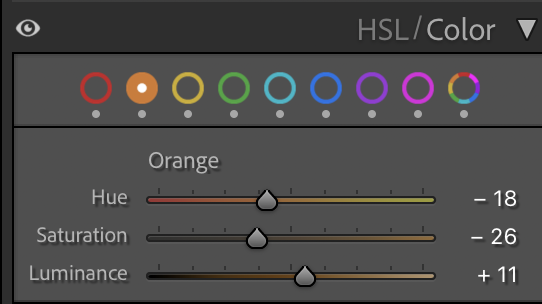
After cropping my photo, I start to make colour adjustments. There are plenty of tools I use to adjust colours to my liking. The four main tools are; the HSL (hue, saturation, and luminance) tab, the colour curves, the saturation slider, and the vibrance slider.
The HSL tab adjusts the hue, saturation, and luminance of specific colours within your image. This is where you’ll really start refining the “look” of your image. For example, if you have a picture of the ocean and want to adjust the colour of the water, you can navigate to the HSL tab and adjust the hue of the blues.
Pro Tip: if your skin tones look way too saturated but you are happy with the rest of the photo, try lowering the orange saturation in the HSL tab.
10. Apply Masking and Spot-Healing
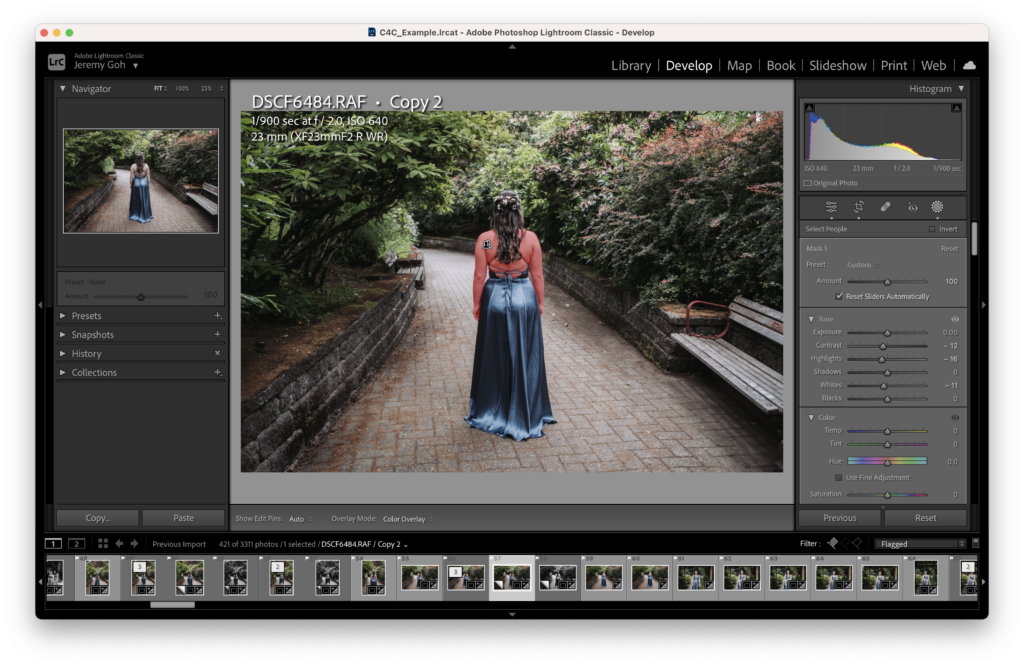
After adjusting colours, I move on to masking and spot healing. This is the part where I remove or reduce any distracting elements from the image.
Masking is used to adjust the light and/or colour of specific areas of the photo. Lightroom has a feature where you can automatically mask parts of the photo like; the subject, sky, background, or even specific features of people. For example, if we have a photo of multiple people, “Person 1” and “Person 2”, Lightroom can create a mask as specific as Person 2’s facial hair and teeth.
The purpose of spot healing is to remove features from an image. Some of these features may include; dust spots, skin blemishes, distracting background elements, or anything else distracting in the image.
If I can’t get Lightroom to remove something and still look natural, I resort to Photoshop. Lately, I’ve been using Photoshop’s AI integration, Generative Fill, to edit photos. Check out my article to learn how to easily set up Generative Fill and get insanely good results with only a few clicks. If you’d like to know how to send photos from Lightroom to Photoshop and back, that article also covers exactly how to do that.
Another useful software is Luminar Neo which works as standalone software or a Lightroom plugin. When I do use it, I use it for AI masking, relighting, and portrait effects.
11. Correct For Lens Distortion
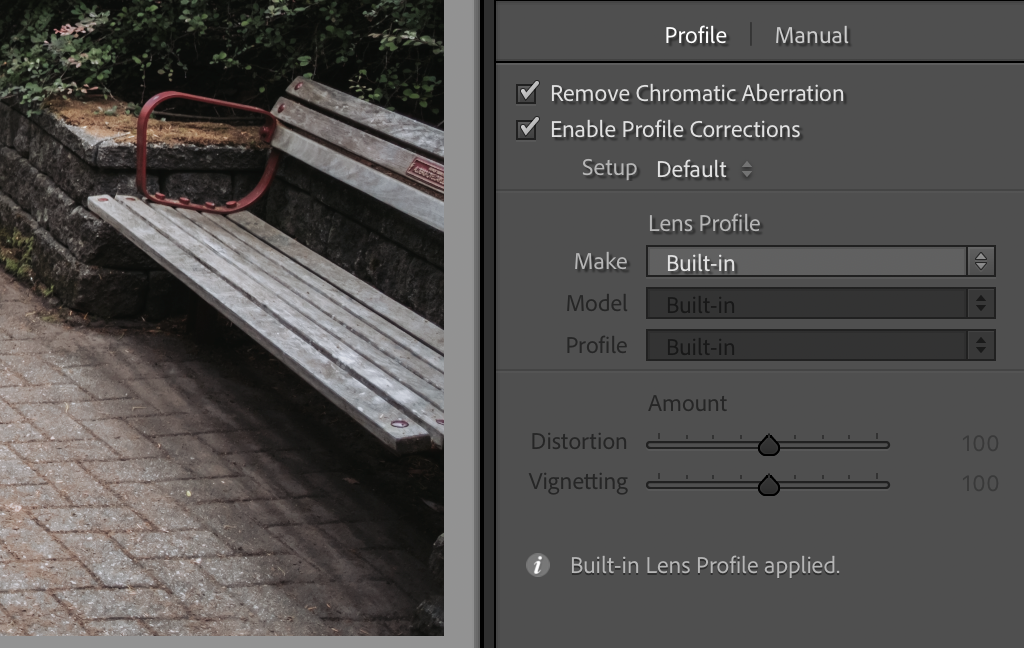
Lens distortion is exactly that, distortion to the image caused by the used lens. I won’t go into the specifics of lens distortion in this article, instead, I’ll just show you the difference between an uncorrected and corrected image.
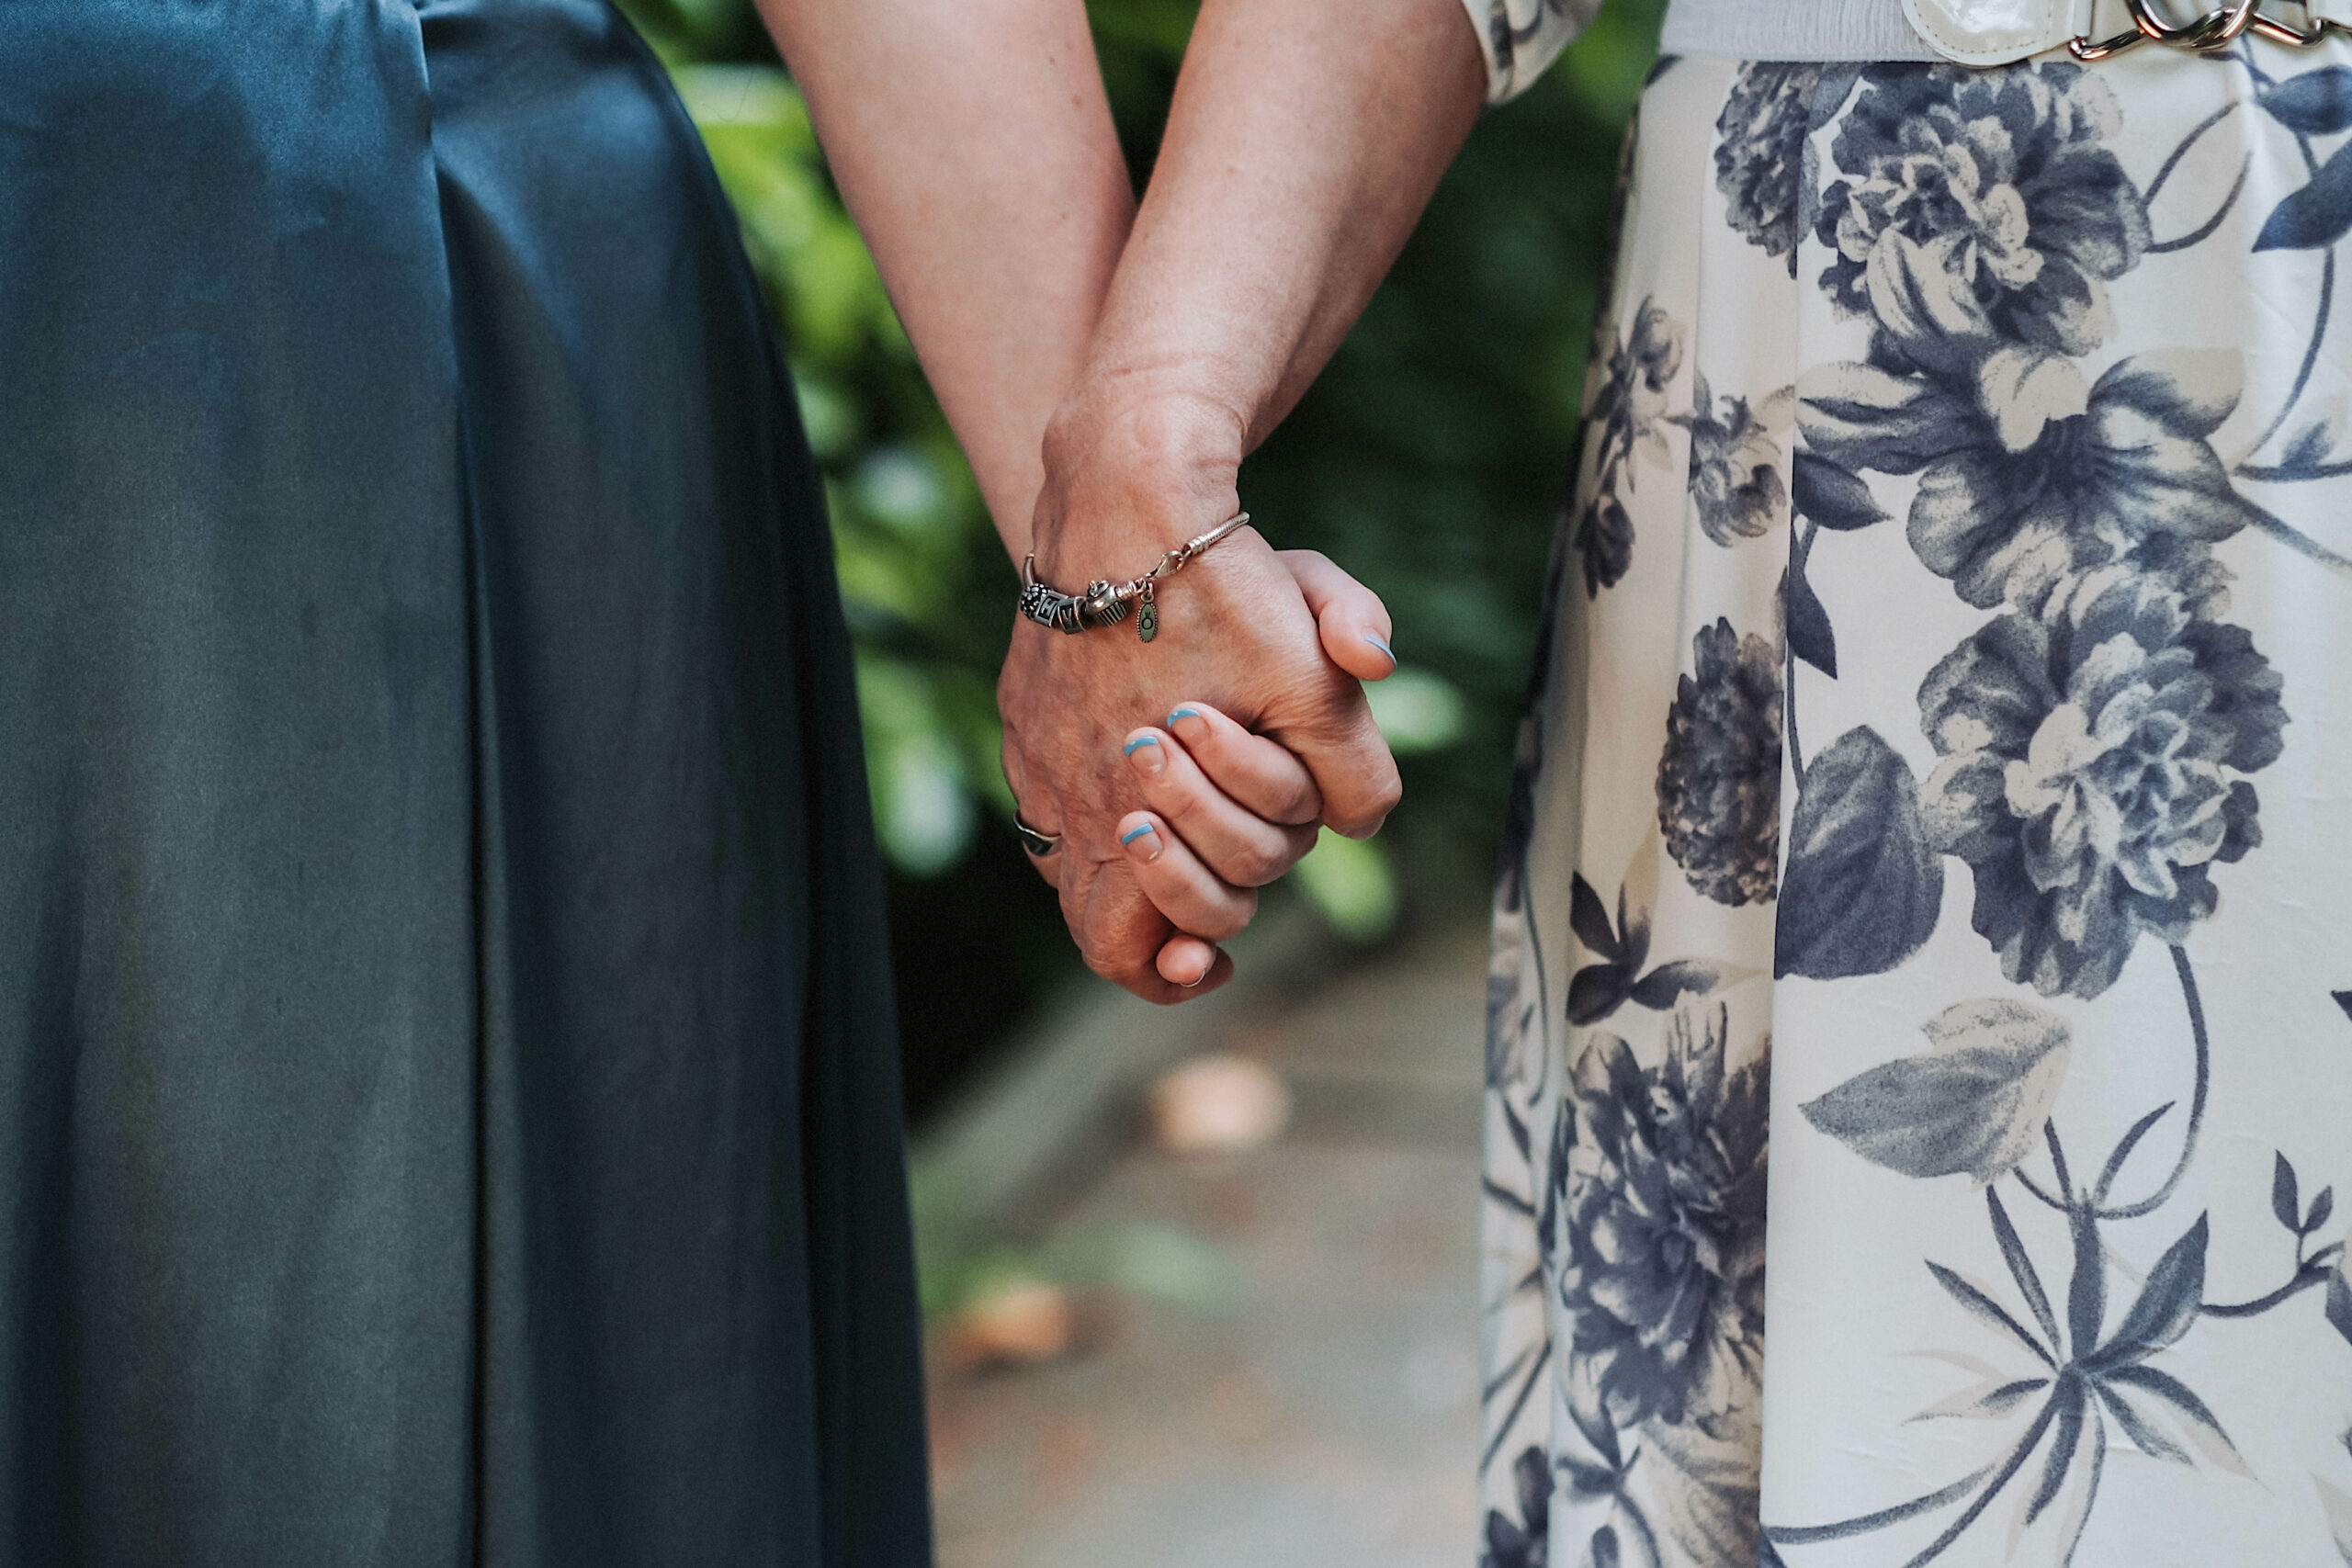
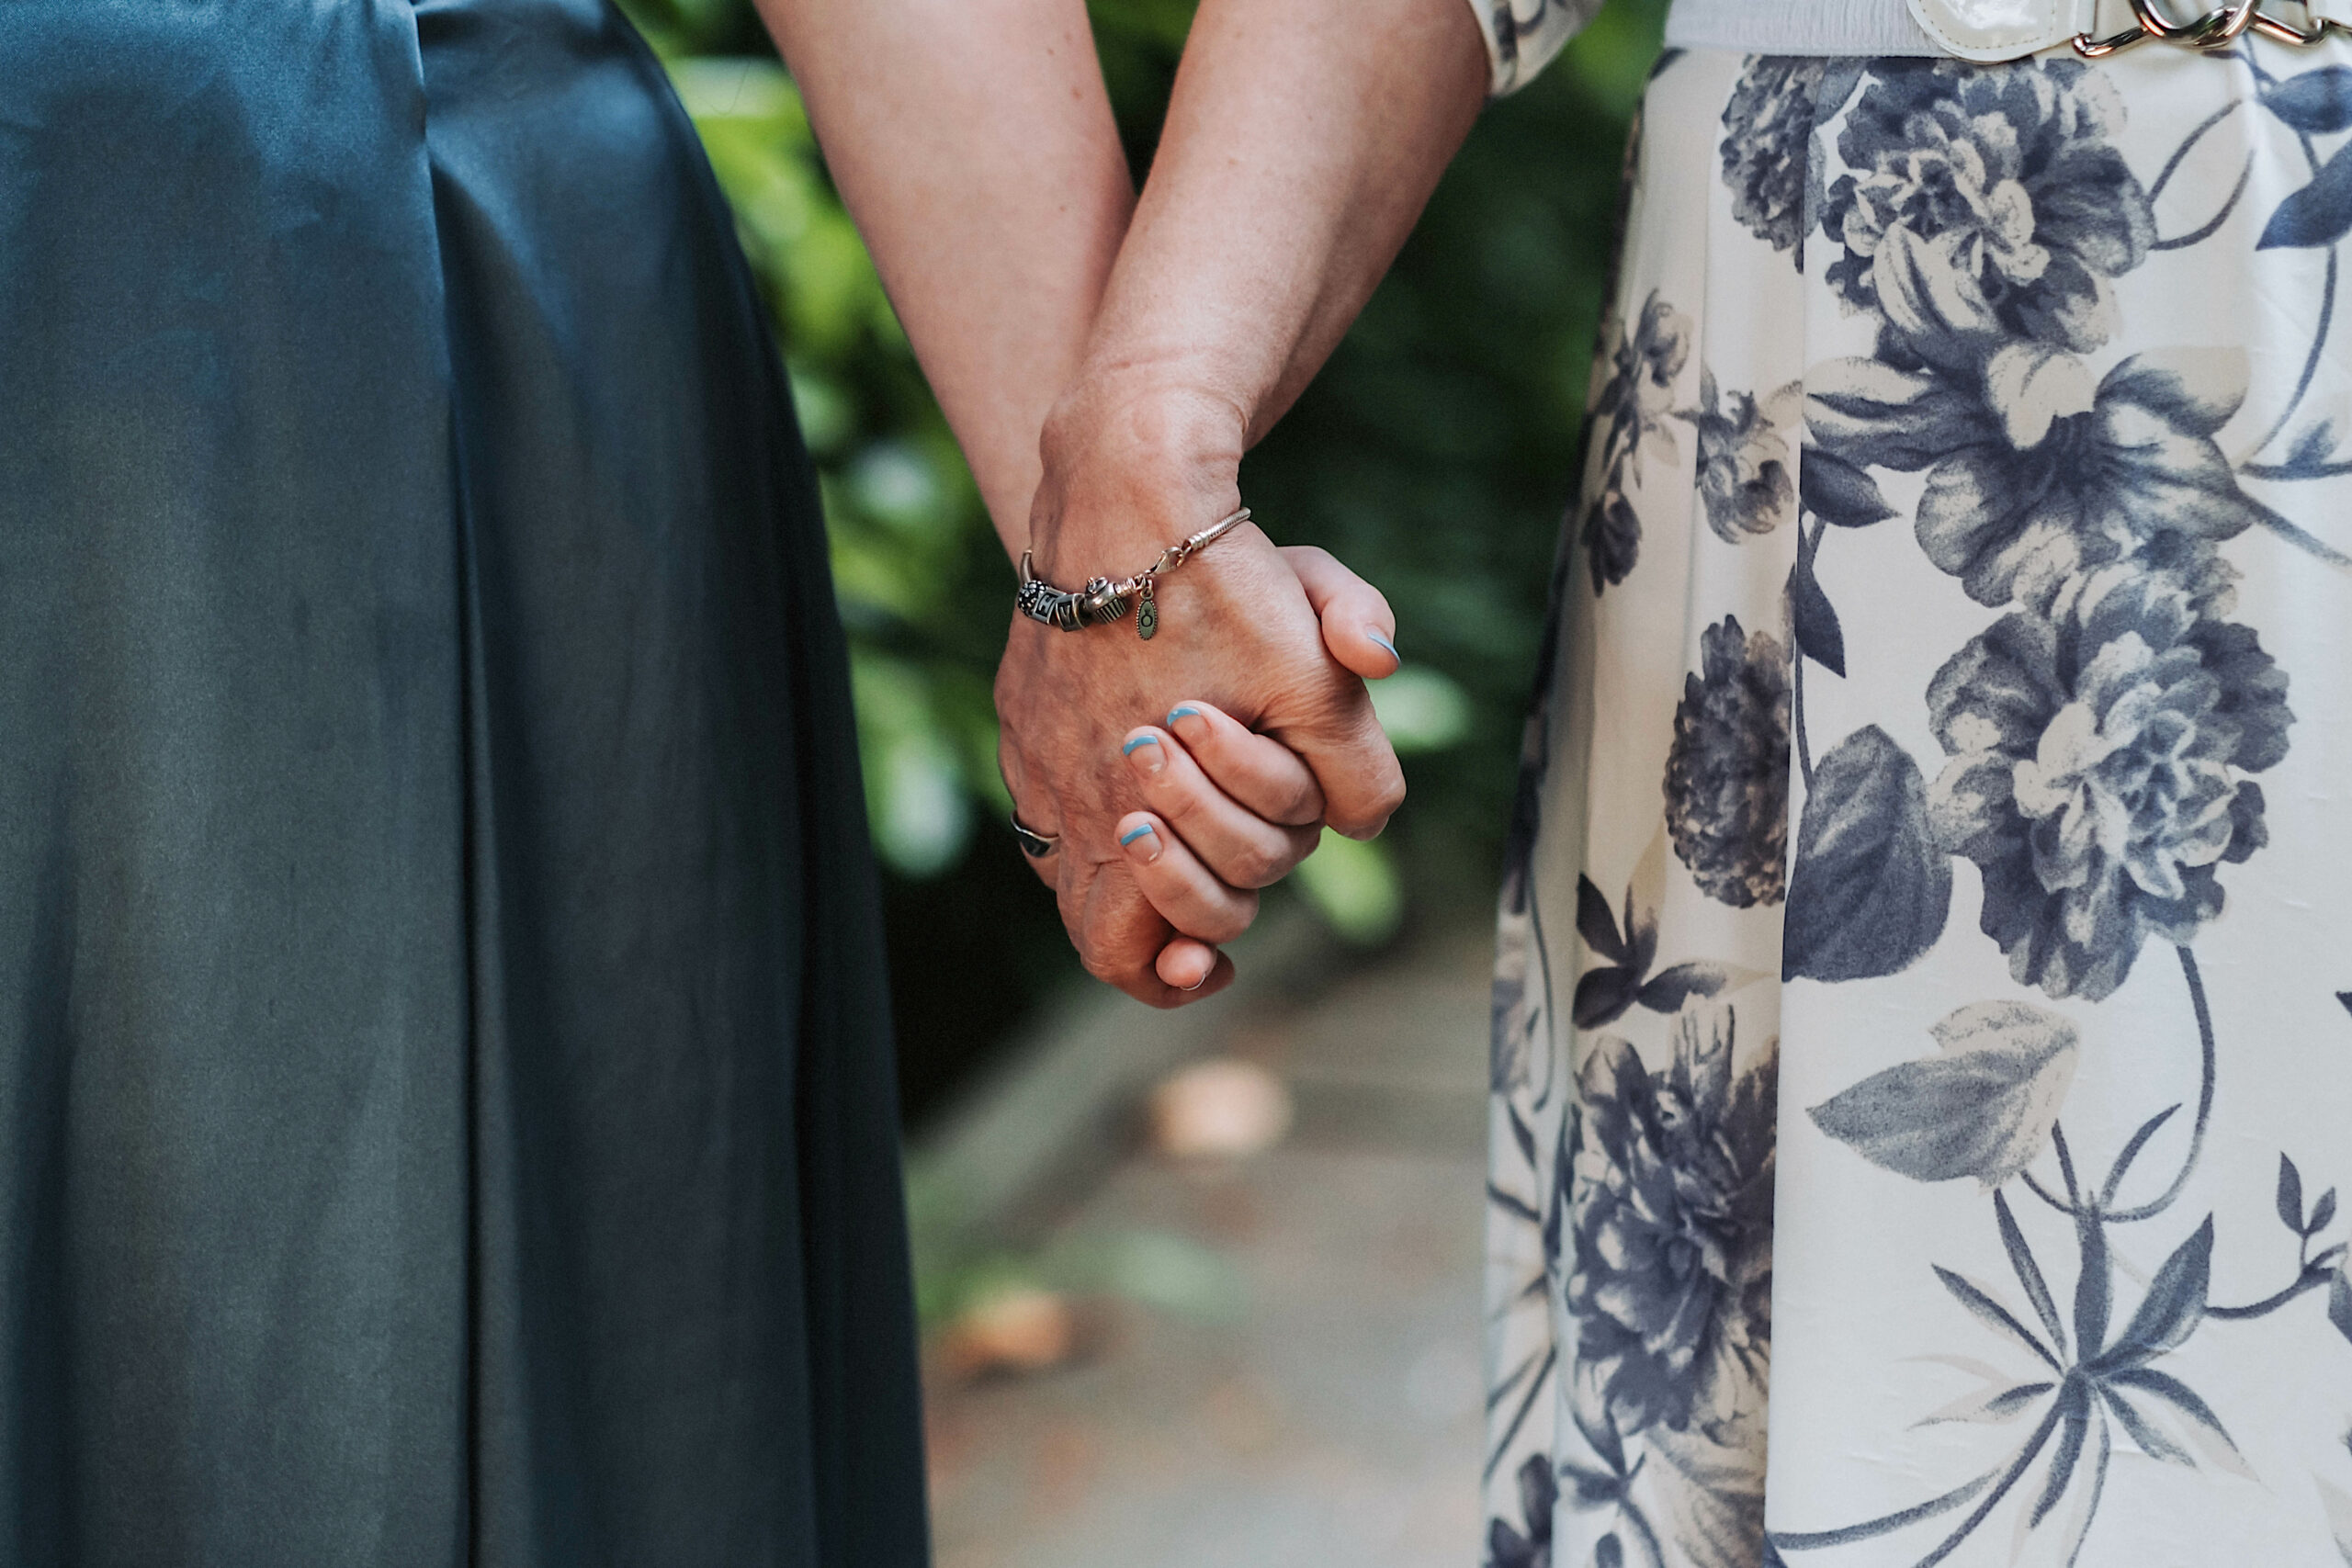
Consider the two photos above, the first is before I corrected for lens distortion, and the second after. Most of the time, with first-party lenses, lens distortion is corrected in-camera. With third-party lenses, you sometimes need to download lens distortion profiles from the manufacturer’s website and install them into your editing software.
If the “Lens Correction” tab says “Built-In” that means you do not need to correct for lens distortion, it was done in camera.
12. Add A Vignette
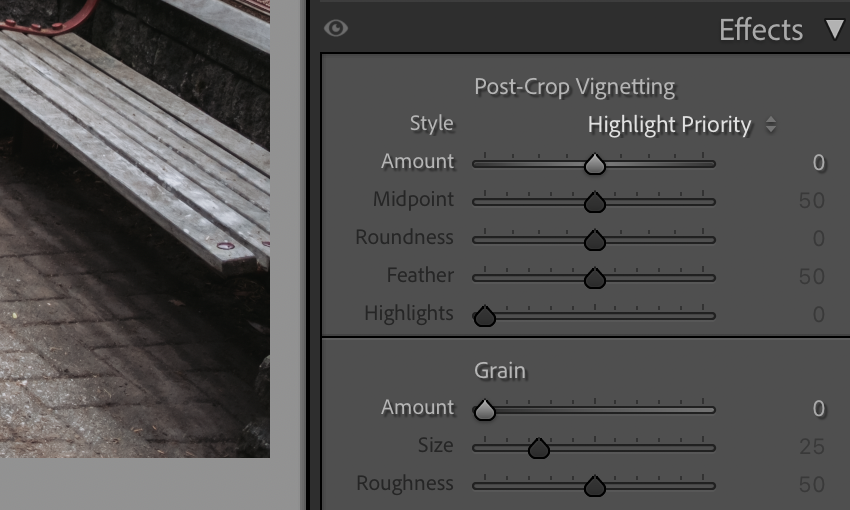
The final step I take before sending my photo out for finishing touches is to add a vignette. Now, I don’t do this for every photo, but when I add one, it’s at this step. Keep in mind that, in Lightroom, the vignette applied is a post-crop vignette meaning it will apply the vignette to your image after you’ve cropped it, not the original image.
13. Export Photo To Secondary Software
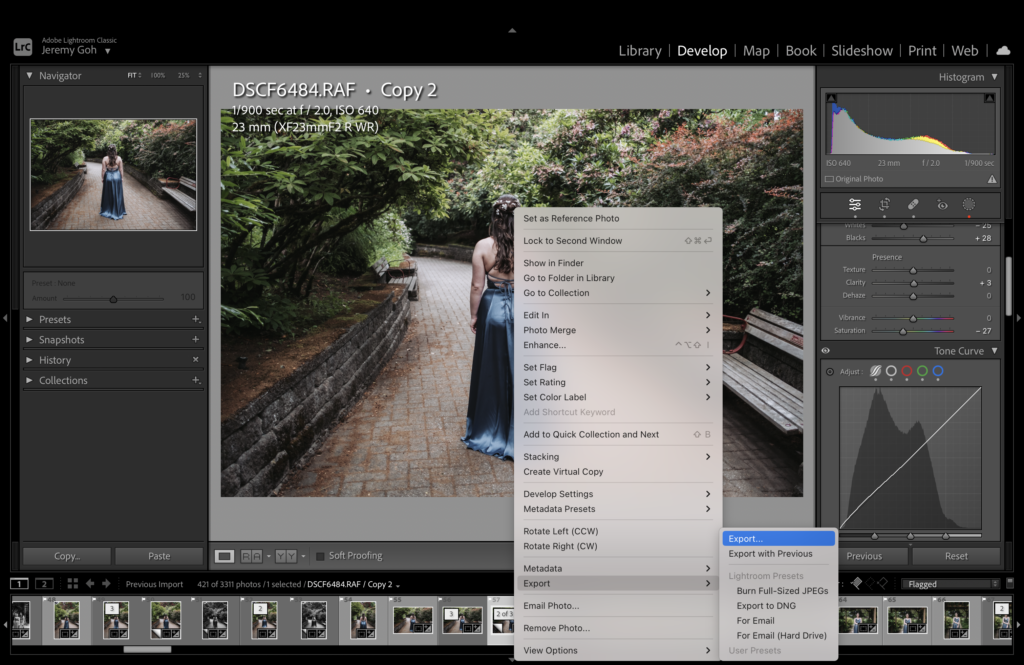
At this point, I’m done with my editing in Lightroom. I do all of the editing for my entire shoot in Lightroom before sending it to my secondary software, Exposure X7. To do this, I highlight all of my images by clicking on the first one in the photo roll at the bottom of the screen, holding shift, then scrolling to the end and clicking the last one.
With all of the photos highlighted, I right-click on one of them and go “Export > Export…”
Below are the settings I use for exporting. Keep in mind, when it comes to ppi (pixels-per-inch) I use 72 for digital copies and a minimum of 300 for prints. Take special note of the “Post-Processing” section, that is where I tell Lightroom to send the photos to Exposure X7.
14. Add Sharpening & Grain Adjustments
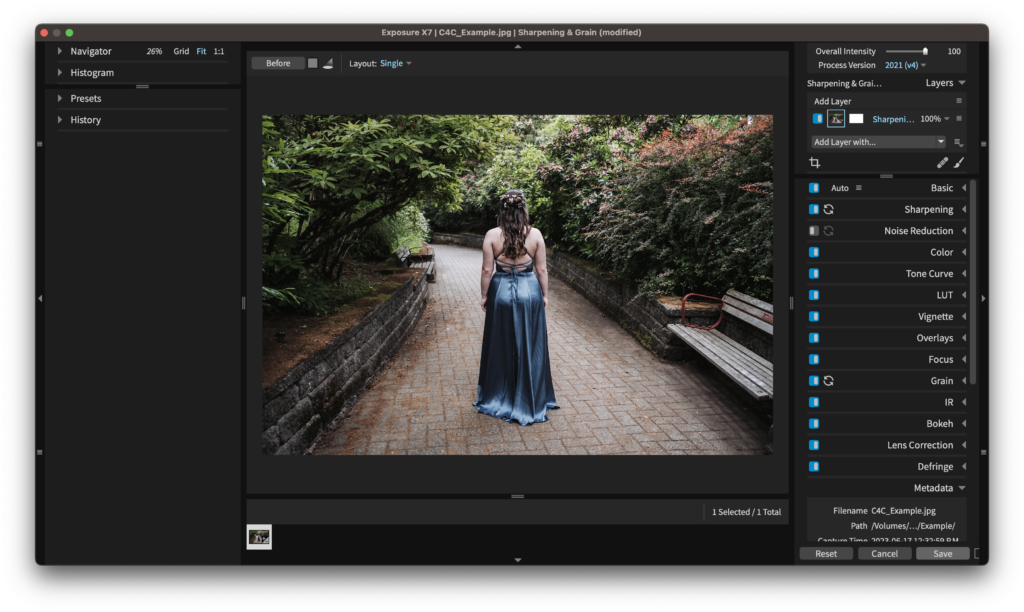
After receiving the photos in Exposure X7, I add sharpening and grain. I have custom-built presets depending on the type of photo and the ISO the photo was shot at. I use Exposure X7 specifically because of the customizability of the sharpening and grain settings.
The reason why ISO matters is because, the higher the ISO, the more noise in an image. Now, this is a huge oversimplification. As a photographer, it’s crucial to understand this concept, so I wrote an article detailing exactly what noise is and how to avoid it.
15. Make The Final Export

At this point, all of my editing is completely done. The final step is for me to press “Save” in the bottom right of the Exposure X7 tab, which will update the exported photos with the sharpening and grain I just added.
Every photographer has their own editing process and, to be frank, my editing process is constantly being updated as new features get released or as I upgrade gear. If you’re a new photographer looking to speed up your editing, the first step is to learn your software; the second step is to practice, practice, practice!
Jeremy Goh
Jeremy grew up volunteering at church and has also worked in a church setting. Along with working as a freelance creative, Jeremy is studying for a business degree in finance and international business.


